Sunday, May 30, 2010

I am obsessed with Mexican cheese

I've always loved cheese, even throughout my college and adult years when I was lactose intolerant. Blue, provolone, curd, Parmesan, feta, string, brie, Gouda--you name it, I love them all! About a year ago I had some Oaxaca cheese on a salad at a Mexican restaurant. I can't even tell you about the salad because I was so enthralled with the cheese. It's all I remember. I loved it so much I went back the next day and had it again. I suppose that's when my love of Mexican cheese began. That loved deepened recently when Mr. C and I had chicken chilaquiles for dinner.

I've heard of chilaquiles before on Food Network, but I'd never considered making the dish. Chilaquiles is a Mexican dish that was created to help people use up leftovers. It's traditionally made using meat, cheese, corn tortillas, and chiles. I recently checked out the Everyday Food "Great Food Fast" cookbook from my library and found a recipe for chicken chilaquiles inside. (I am still on a "no cookbook" buying restriction for another month so I check out A LOT of them from the library.) I decided to give the recipe a try. Oh happy eating, am I ever glad I did! Look at this gorgeous dish:


I worried the recipe might be too complicated or time consuming, but it was surprisingly quick and easy. (I guess that's why it's in a cookbook called "Great Food Fast.") It came together in under 30 minutes. I had to buy a couple ingredients I don't usually have on hand. The recipe calls for chiles in adobo and queso fresco or queso anejo cheese. Both were easy to find at Walmart. And, happy for me, they were not expensive. There was one ingredient I couldn't find, but I was able to make do without it.

Here's the recipe. We'll chat more about it on the flip side:

Chicken Chilaquiles from Everyday Food
1 T olive oil
4 garlic cloves, chopped (I always used minced garlic that I buy in bulk at Costco)
1 can (28 oz) whole peeled tomatoes in puree
2 chipotle chiles in adobo (from a small can), finely chopped
1 T adobo sauce (from the same can as the chiles)
1 c water
4 c shredded chicken
1/2 c lightly packed cilantro, chopped, plus extra for garnish
1/4 c crumbled queso fresco or queso anejo cheese (can substitute feta)
4 c tortilla chips
1/4 c sour cream
Combine the oil and garlic in a large (3-4 quart) saucepan. Cook over medium heat, stirring occasionally, until the garlic is fragrant and sizzling (about 1-2 minutes). Add the tomatoes with their puree (breaking tomatoes up), chipotles, adobo sauce, and water. Bring to a boil, season with salt. Reduce the heat and simmer rapidly until lightly thickened (6-8 minutes). Add the chicken and cook, stirring, until hot (about 3 minutes). Remove from heat; stir in the chopped cilantro. Divide tortilla chips among 4 shallow bowls; top with the chicken mixture and sauce. Garnish with cilantro, sour cream, and cheese.

Remember when I said there was an ingredient I couldn't find? Believe it or not it was the tomatoes in puree. Search as I might, I couldn't find any. I ended up just using regular diced tomatoes and they worked fine. The sauce may have been a little thinner than it should have been, but neither Mr. C nor I cared. It was delicious. Also, there is something to keep in mind about the spice level. Adobo sauce and chipotle chiles carry some heat. If you don't like a lot of spice, ease off on the tablespoon of sauce and the chiles. Mr. C always sweats when he eats spicy food. He was dripping with this one. Next time I think I may half the chipotle chiles and the adobo sauce. I like spice, but it was a tiny bit overwhelming. (Ironically, the leftovers the next day didn't seem as spicy.)

Now, the cheese. Ahhhhhh, the cheese. Just look at that gorgeous cheese!


The recipe actually calls for feta, but the top of the recipe page says, "For an authentic touch, use fresh Mexican cheese...in place of feta." Do it. DO IT, DO IT, DO IT! The recipe recommends queso fresco which is a fresh soft cheese or queso anejo which is an aged cheese. I used the fresco and, like my experience with the salad at the Mexican restaurant, I was enthralled with it. It's a crumbly cheese so I broke off pieces like I would with feta. I had plenty left over after making our 2 plates. The extra is happily hibernating in my freezer awaiting it's next lovely appearance.

I cannot say enough about the cheese.

We loved the tortilla chips on the bottom of the dish. For the first few bites, the chips were still crispy and the texture of the dish was fabulous. The longer the sauce sits on top of the chips, the softer they get. The tortillas become almost a soft corn meal, yet they stay just as tasty. We opted not to put the sour cream on top.

This dish is so easy and so tasty. Go make it, right now! Unless you don't have any Mexican cheese. Go get some and THEN make it. It's the one ingredient that takes this recipe from delicious to out of this world. But beware! Once you try the fabulousness that is Mexican cheese, you'll be hooked.

(I'm finally posting the recipe because it's time for the cookbook to go back to the library and I need the recipe for my binder of recipes!)

Monday, May 24, 2010

low calorie brownies


today i saw a blog claiming they had a recipe for 25 calorie chocolate chip cookies. then i read that the cookies were only 2 t. of cookie dough. BLAH. not ENOUGH! but last night i wanted a treat to watch celebrity apprentice. so i lucked out when i pulled a hungry girl recipe for brownies on saturday.

let me start off by saying, these are obviously not the really chocolate-y, fatty, high calorie brownies you may want for your girls night outs. they do lack a little bit of sugary flavor but let me tell you, you really aren't missing out on a whole lot. and the comfort of knowing if you eat the whole pan you really aren't out that many calories is really nice.

mr. e was skeptical when i told him i was making low calorie brownies. he was unsure of how big they were going to be. i noticed they were only 133 calories a brownie but i thought that meant the suggested serving size was going to mean they were only going to be the size of a quarter. not so! this recipe makes 16 brownies! out of a 13x9 pan that means your brownies really are decent sized so you aren't giving up that much.

please be aware though, knowing the brownies are not as high calorie will make it easier to talk yourself into eating half the pan.

i did change a few things in the actual recipe. hungry girl calls for 1 t. coffeemate sugar free french vanilla powdered creamer. now, i don't drink coffee and so i had zero desire to buy this. in the recipe you mix it in with water and then add it to the cream cheese. i just added a bit more vanilla. it was perfect.

hungry girl "swirls gone wild" cheesecake brownies
makes 1 13x9 pan, 16 brownies

1 18.25 ounce box devil's food cake mix
1 15 oz. can pure pumpkin
6 oz. fat-free cream cheese, room temperature (PLEASE have enough patience to make sure this is at room temperature)
1/4 c. Splenda No Calorie Sweetner (granulated)
1 t. creamer (remember, i got rid of this)
1/4 t. vanilla extract (remember, i added more of this)

preheat oven to 400 degrees.

in a large mixing bowl, combine cake mix and pumpkin stirring until completely blended. batter will be really thick. i mean, REALLY thick.

spray a 13x9 pan and spread batter into the pan. now, the batter is not going to be all that willing to spread so i had to push it with my fingers. i was really sad to have to do this since i ended up with batter all over my hands. oh, how devastating.

place powdered creamer in a medium mixing bowl. add 2 T. of warm water and stir until creamer is dissolved. (remember, i skipped this step). add cream cheese, splenda, and vanilla. using a whisk, or fork, mix vigorously until completely blended, smooth, and lump free.

(FYI... I just mixed the sugar with the vanilla and cream cheese. then stirred. i did add a little bit of warm water to just make sure it was nice and smooth. )

spoon cream cheese mixture over the batter and use a knife to swirl it in. don't worry if it isn't perfect. i ended up just spreading it on top actually.

bake in the oven for 20-25 minutes until a knife comes out clean.


once these were made i actually had to put them in a bag and in the freezer so i would leave them alone.


it has these warnings because if i am craving anything, trying to lose weight or alone and open this bag i will eat the whole thing myself.

delicious baked ziti


our mom doesn't cook. can you believe it? she just doesn't. she hates it. our parents eat out nearly every night and when they eat in it is mainly prepared foods. one of the things my Mom would heat up when I was in high school a lot was ziti from costco. oh my deliciousness. it's heavenly. and sometimes when i would come home from college on breaks, this managed to find itself into the oven. even still, going home as a new mommy myself, this finds its way into the cart.

so i was excited to find a recipe for baked ziti on a recipe blog. i figured it wasn't going to be nearly as good as the costco one but i thought it would be a decent replacement since my costco doesn't supply the delicious ziti. boy was i wrong. it tasted EXACTLY the same! I was shocked! I went back for seconds...maybe even thirds.

then I had it for lunch the next day (2 bowls) and dinner the same day (1 bowl, because there wasn't enough for Mr. E and I to both have seconds).

i only made a few alterations to the recipe and i would make just some slight alterations later. but i'm sure the original correct recipe is just as good! the original recipe is: HERE.


baked ziti
makes 1 13x9 pan

1 pound dry ziti pasta
1 onion, chopped (i love onions...so delicious)
1 pound hot Italian sausage---USE HOT ITALIAN SAUSAGE. if you forget to buy it, you can use ground beef but please use hot italian sausage. it's perfect. and make sure you have one pound. i only had 12 oz. and it was not nearly enough for my palate.
2 t. minced garlic
2 t. italian seasonings + 2 more teaspoons
35 oz. your choice of spaghetti sauce (I used Prego because if Ragu stepped into this house, Mr. E would step out)
6 oz. Provolone cheese, sliced (9 rounds) anything with provolone is heaven to me.
3/4 cup sour cream
3/4 cup ricotta (if you really need to you can use just sour cream or just ricotta, but the sour cream really does help the ricotta to spread well once it is in the dish.)
8 oz. mozzarella cheese, shredded

bring water to a boil, make sure it has a good sampling of salt in it and pour in your ziti. cook until al dente, about 8-9 minutes. make sure it isn't overcooked because it will continue to cook a little in the oven. no one wants dry pasta, trust me.

in a large skillet, and i mean large people, brown the onion and sausage over medium heat. add minced garlic and cook for a minute. please don't burn your garlic. i manage to burn it just about every single time i use it. add the spaghetti sauce and italian seasonings and summer for about 15 minutes.

while your sauce is simmering, make your ricotta mix. mix your ricotta and sour cream and put 2 t. of the italian seasonings into a bowl and mix well. you may find you need more italian seasonings. let's be honest, i don't measure seasonings. or vanilla...but that's another story.

preheat your oven to 350. spray a 13x9 dish. then layer as follows:
  • 1/2 ziti
  • 1/2 sauce mixture
  • provolone cheese (oh delicious)
  • ricotta mix
  • remaning ziti
  • remaining sauce
  • mozzarella
bake for 30 minutes or until the cheese is melted.

please make this. you will love it!

Tuesday, May 18, 2010

It's Not A Recipe, But....

...how could I not post these hilarious pictures. This is Mr. C attempting to rescue my largest sheet pan that has taken a flying leap out the back of the oven drawer and is now trapped under the oven.

Don't you just love the giant flashlight!

I am happy to report the rescue mission was an eventual success.

You Made Those Cookies How?

About a month ago I decided to follow through with every good intention or thought I had during the week. I always have ideas to do things for people, but so often my good intentions fall by the wayside or I forget as the days go by. That week, I was determined to do every single thing that popped in to my head. One thought I had was to take a treat to a woman who had really impressed me recently and attach a note of gratitude to it. Since I also needed to bake cookies for a church activity that week, the timing was perfect.

Enter Martha...Stewart, that is. I started hunting through cookbooks for something fun and yummy. I love trying new things, especially with sweets. When I couldn't find anything that intrigued me, I turned to Martha. I have both her cookie and cupcake books. I wish I could say they are well used. I cannot. In fact, until last month, they were both UNused.

As I looked through Martha's Cookies, I found something different and fun...CHOCOLATE WAFFLE COOKIES!

I should say that I've had waffle cookies once before. They were sadly disappointing. I did have a moment of worry that these would be equally as blah as those were, but I decided to risk it anyway. The cookies appeared be a quick bake so I figured if they were disgusting, I'd just scrap them and make something else. Plus, I reasoned that if the recipes is in a Martha book, how bad could they be. Time consuming and complex, probably. Yucky tasting, not likely.


I am so happy I didn't bypass these cookies because of that bad experience in the past. I loved these! They were a nice change from a basic round cookie or cookie bar. The fact that I was able to make them super fast was a bonus.

I ended up making 2 changes to the recipe...one on accident and one on purpose. (I am the queen of screwing up a recipe and not realizing it until it's too late to fix.) More on that later! For now, here's the recipe:

Chocolate Waffle Cookies (slightly adapted from Martha Stewart's Cookies)
3 oz unsweetened chocolate

1 c butter
4 eggs
1 t vanilla
1 1/2 c sugar
1/2 t salt
1 1/2 t cinnamon
1/2 c + 2 T cocoa powder
1 1/2 c flour
powdered sugar for dusting
Melt chocolate and butter in a saucepan over med-high heat, stirring constantly. Let cool slightly. Put eggs, vanilla and sugar in the bowl of an electric mixer. Mix on medium speed until pale, 4-5 min. Mix in chocolate mixture (I only let mine cool the 4-5 min), salt, cinnamon, cocoa powder and flour. Heat a waffle iron until hot; lightly coat with cooking spray. Spoon about 1 T of batter onto the center of each waffle iron square. Close cover; cook 1 1/2 minutes. Transfer to a wire rack, bottom sides up. Let cool completely. Repeat with remaining batter, coating grids after each batch. Dust with powdered sugar. Makes about 4 dozen. (I got about 4 1/2.)

So, what were my changes?

The unintentional change/mistake was to put 1/2 c PLUS the 2 T of cocoa in the cookie batter. I missed the word "divided" when reading the original recipe. I didn't realize the 1/2 c was for the batter and the 2 T was for a glaze to dip the baked cookies in. However, I won't leave out the extra cocoa next time. If you prefer, use the original 1/2 c, but I highly recommend the extra tablespoons.

What was my intentional change? Eliminating the glaze I just mentioned. The recipe says to make the glaze and then dip the raised part of the cookie in it. I actually made the glaze. I even dipped a few cookies in it. But, a few was all it took to realize I didn't like it at all. It was too bitter and, in my opinion, added nothing to the cookie. I liked them with just the dusting of powdered sugar on top.


I tried varying the cook time just a bit. I wanted to make sure my waffle iron wasn't a little hotter or cooler than Martha's. I guess it wasn't because the 90 seconds she recommends was right on. I'd recommend you stick with it.

Just one tip for removing the cookies from the iron: A FORK. I tried a variety of ways to get them off the iron like poking them with a knife or lifting up the corners. The cookies are still quite soft when you open up the iron, so just about everything I tried tore the cookies up or broke off the edges. (My mistakes made for good testers though!) I finally found that using a fork and inserting it in to the side of the cookie--level with the raised parts of the iron--worked perfectly. I could put the fork in far enough to lift the cookies off and flip them over to put on the cooking rack.

I'm not sure if the lady I took a plate of cookies to liked them (I can only hope), but they were a big hit at my church event that night. Everyone kept saying, "Cookies from a waffle iron? I've never seen that before."

While my cookies were a success, I'm afraid I won't be making them again anytime soon. Sadly, about 2 weeks later, my waffle iron did a swan dive off the kitchen counter and fell to its death. I wanted to try and keep using it. Mr. C was opposed citing possible electrocution from the now exposed cords and plates. Oh well. Maybe now I can talk him in to getting me one of those cool flippy irons like you see in hotels!

Friday, May 14, 2010

A Delicious Start to a New Tradition

Every now and then one of our local grocery stores prints up cards with employee provided recipes and gives them out to the customers. Sometimes those recipe cards are part of a "sample our products" type day and others are just lying around the store hoping to be picked up and treasured by someone. Far be it from me to let any recipe go unnoticed! On my way out of the store one evening after having taught a cooking class, I found a few of these cards. I happily brought them home and added them to my "try this someday" pile. (Incidentally, my "try this" piles are huge...and growing. They are about to undergo a MASSIVE clean out in the next week or so.)

Mr. C and I started a fun tradition a few months back. With Sunday being our day for dessert (usually because we have company), I asked him to choose something for me to make. Mr. C decided to choose something new from my huge pile of "try this" dessert recipes. That practice stuck and he's chosen something new for us to try almost every Sunday since. The recipe he chose that day was from a recipe card I'd picked up a local grocery store...Sheet Cake Cream Puff.

Since I can't say remember ever meeting a cream puff I didn't like, I thought it was a perfect choice! I wasn't sure what to expect, but it's always fun to try something new.

Please pardon the bluish "sunlight" fluorescent light of my kitchen, but check out the beautiful base of this cake!


I was truly giddy when I opened up the oven and saw the gorgeous peaks and valleys of the base. I mean, honestly, is this not the coolest dessert base ever! Those pastry crevices were just screaming to be filled with something delectable.


I immediately grabbed my camera and called for Mr. C to come and see!


I've made cream puffs once before, so I should have expected the cake's light and fluffy batter to bake up like this. But, I didn't. For some reason I thought it would be just a regular baked cake. Don't you just love it when something you make is visually delicious?!

Next came what would typically be inside a cream puff, but in this instance it got slathered on top instead. Holy yum! The "filling" layer is a smooth combination of cream cheese and vanilla pudding.


The peaks and the valleys of the base made for lots of places for the cream mixture to gather and be happy. The cream mixture got even happier when I covered it with a layer of whipped topping!

The final touch was my personal favorite ingredient...CHOCOLATE! The recipe calls for "chocolate shavings or syrup." There was no question in my mind. I opted for shavings.

In anticipation of making chocolate mousse, I'd picked up a large bar of Belgian chocolate at the grocery store the week before. I had plenty of extra, so I used a knife and started shaving from the corners of the blocks.


As you can see, my shavings were very, very fine. If you make yours as fine as I did, beware the static electricity. Mine were zipping all over the place (as you can see from the edges of my plate.) You can certainly make them a lot thicker if you prefer.

As a side note, if you can find this Hageland brand of Belgian chocolate, it is fantastic. The chocolate is creamy, it's a great bar for cooking, and it's cheap! WOO HOO! The bar is about $4.50 at Walmart and weighs almost a pound. (I have not been able to find it at all Walmarts though.) It also comes in milk chocolate if you prefer.

The chocolate shavings were the crowning glory of the dessert!

I'd made more shavings that I really needed, so I really loaded up the top. I figured why not. A little extra chocolate never hurts, right!

Here is the long, side view of the finished product. I swear, this picture makes it look like the dessert is 10 feet long...and no one would have complained if it had been!

We loved this dessert...and so did our company. More than one person went back for seconds. It's super easy to make and overall, quite inexpensive too. You've got to love something that's both tasty and cheap!

Sheet Cake Cream Puffs from Laura the Grocery Supervisor
1/2 c butter
1 c water
1 c flour
5 eggs
8 oz cream cheese, softened
1 lg box vanilla instant pudding
8 oz frozen whipped topping
chocolate shavings or syrup
Boil water and margarine. Add flour to the pot, mix well. Add eggs one at a time, beating well after each one. Spread on to a greased sheet pan. (I used my largest sheet pan that measures 12" x 17".) Bake at 450 degrees for 20 minutes. Let cool. While the base is cooling, prepare the instant pudding as directed on the package. Mix together with softened cream cheese. Spread mixture over cooled crust. Top with whipped topping and chocolate. Refrigerate.

Sadly, I wouldn't say this dessert has a long shelf life. The longer the filling sits on the light and fluffy base, the soggier it gets. But, it won't go bad immediately. We ate it again the next day and it was fine. You'll probably find around day 3 that your dessert is sneaking past it's prime.

I'd say Mr. C's dessert choice that day was a winner for sure. Plus, it helped spawn something fun and new for us. His dessert choice is something we can both look forward to. (In fact, just 2 hours ago he said, "I need to pick our dessert for tomorrow.") Good job honey! We've started a great new tradition together and our recipe file has a delicious new permanent resident.

Thursday, May 13, 2010

MMMMM...Mango

I can only assume it's because of Cinco de Mayo, but mangoes seems to be on sale all over. With most fruit still being on the expensive side, cheap mangoes stood out to me at the grocery store a couple weeks ago. I thought they'd make for a cheap side dish with dinner. Plus, in trying to incorporate more seafood in to our meals, shrimp tacos were on the horizon for dinner. Mr. C has fond memories of some shrimp tacos with mango salsa he had at a local restaurant. Since mangoes were cheap, I thought I could try and recreate what he'd had and not have it cost me too much if it was a miserable failure.

I've never made mango salsa before, so I needed a starting point. I found a recipe for pineapple salsa in a magazine and also did a couple searches on the internet. Most fruit salsas seem to have similar ingredients, so I grabbed my favorite knife and went to work.

Look what I came up with:


Isn't it pretty! I just love the colors and chunky texture.


We ate this salsa two ways--with chips and on our shrimp tacos. I absolutely loved it with chips--Mr. C, not so much. He does not share my deep love of onions. (I've often heard cooks say that red onions are more mild and sweet than yellow, but I must respectfully disagree. I think they are exactly the opposite.) While I found the salsa to be a nice blend of flavors, all Mr. C could taste was onion. I said, "What about the sweetness of the mango or the crunch of the cucumbers?" All he would say is, "All I can taste is onions." I personally think it was a mental block created as soon as he tasted his first onion. He loved it on the tacos though. For some reason, as a part of the whole cabbage/shrimp/taco combo, the salsa was perfect for him.

Since Mr. C didn't love it on chips, there was plenty left for me to have for lunch the next day. Delicioso!

Mango Salsa
2 large mangoes, chopped
1 c cucumber, seeded and chopped
2-3 T lime juice (I used fresh squeezed)
1/2 small red onion, finely chopped
3 chopped and seeded jalapeno peppers
1 t minced garlic
1 t sugar
chopped cilantro
1/4-1/2 t salt (start small and add more to taste)
Combine all ingredients in a bowl. Serve chilled or room temperature.

I know what you're thinking, "3 jalapeno peppers!" Don't worry, as long as you take the seeds and veins out, you won't scorch your mouth. They add a nice amount of flavor without a lot of heat. (Try not to splash yourself with jalapeno juice, twice, like I did.) At first I only chopped up one, but I couldn't taste the peppers enough so I added more. The cucumbers provide a nice cool compliment to the peppers. And, if you're wondering why I don't have a measurement on the cilantro it's because I sadly found mine to be all slimy when I opened up my vegetable crisper. It was rotten and I had to throw it away. I hate that! (This is just one of the reasons I want to plant my own herb garden!) I wasn't able to add it this time, but next time I will for sure. I'll probably add a couple chopped tablespoons and adjust from there.

I bet this would be yummy on lovely piece of fish too. Tilapia fillets, here I come!

Wednesday, May 12, 2010

Berry Berry Yummy

A couple weeks ago I was perusing my recently delivered copy of Simple and Delicious--my favorite cooking magazine. I was planning out my next 2 week meal plan (yes, I only shop once every 2 weeks) and choosing new recipes to try. Inside each issue are contest recipes submitted by readers based on an ingredient or cooking style. Just in time for summer, the newest issue highlights "berry bonanza" winners. The grand prize recipe is a delectable looking blueberry bread pudding.

Let me just interject here and say that I have a long-standing love of bread pudding. That love deepened last year after making Paula Deen's recipe from her first Lady and Sons cookbook. We've made Paula's recipe countless times for special Sunday desserts and visiting friends. In fact, we've had it so much over the past year I was on a small bread pudding boycott.

I have also been obsessed with blueberries lately. After sampling dried blueberries at Costco a few weeks ago (is it possible that anyone loves sample time at Costco as much as we do?), and finally digging up 7.99 to buy a bag, I've gone blueberry crazy. (I used the dried blueberries in lemon blueberry scones last week. YUM!)

Knowing we always have a special dessert after Sunday dinner, I decided it was time to end the boycott and try this prize-winning recipe. I reluctantly forked out 8.99 to Costco for a clam shell of plump little blueberries. (I also added grilled chicken blueberry salad to my menu. Without more than one recipe to use the berries for, 8.99 is too expensive for my grocery budget.) I also bought a loaf of Mr. C's favorite french bread from Walmart and a bag of white chocolate chips. I knew we were in for something tasty.

Oh boy--were we ever!


Then again, with 4 cups of heavy cream and 2 cups of sugar in the recipe, how bad could it be?

Be prepared, this bread pudding is sweet. I mean, SUH-WEET! If you don't have a blood sugar problem before eating it, you will after.

Aside from tasting great, this is a pretty dessert. I mean, just look at the colors and textures! Golden bread chunks, gorgeous berries, highlights of white chips--it's a feast for your eyes.


With summertime and fruit season approaching, and berry prices hopefully dropping, you'll want to add this one to your "make this" list.

Oh yeah, and if you try it with the sauce, let me know how it is!

Over-the-Top Blueberry Bread Pudding
3 eggs
4 c heavy whipping cream
2 c sugar
3 t vanilla
2 c fresh or frozen blueberries
1 pkg (10-12 oz) white baking chips
1 loaf (1 lb) french bread, cut in to 1" cubes
In a large bowl, combine the eggs, cream, sugar, and vanilla. Stir in blueberries and baking chips. Stir in bread cubes; let stand for 15 minutes or until bread is softened. Transfer to a greased 9 X 13 baking dish. Bake, uncovered, at 350 degrees for 50-55 minutes or until a knife inserted near the center comes out clean. Let stand for 5 minutes before serving.
Sauce:
1 pkg (10-12 oz) white baking chips
1 c heavy whipping cream
Place baking chips in a small bowl. In a small saucepan, bring cream just to a boil. Pour over baking chips; whisk until smooth. Serve with bread pudding.

Tuesday, May 11, 2010

Basil Cream Pasta

Warning: The pictures and recipe you are about to see are not for the low carb, no sodium, non-fat, low cal eaters. The pictures and recipe you are about to view could easily raise your blood pressure, cholesterol, blood glucose level, white blood cell count, kidney output, credit card limit, taxes, fertility, and credit score. You have been warned.

I'm obsessed with this dish. And while it is not the healthiest of choices--you will hardly find it in the Hungry Girl cookbook, possibly not even in the Paula Dean cookbook--we only average this dish about 2 times a month. It's delicious and not too expensive to make. It's simple and only requires a few ingredients that are easily found and changed out if you prefer something else. Let me tell you how my first--and only--original recipe came to be.

I have a gigantic stack of cookbooks. I love them. I love their pictures and ideas. And this past Christmas my wonderful sister, Jackie, gifted me The Pioneer Woman Cookbook. As I turned each page and found a reason to kiss every single pictured recipe I realized this was a cookbook I actually wanted to use, not like those other 30 cookbooks I liked to have around but never use. So, I decided to start a "Recipe Jar". I went through all my cookbooks and wrote down the recipes I actually wanted to try to make. I threw them all in a jar and once a week I pull out one or two to try. Well, I have a bunch of recipes saved on my Google Reader and by bunch I mean enough to make a whole entire cookbook out of. I had a recipe saved that was about Basil Cream Chicken. One night I read through the ingredients and the first couple instructions and started. As it turned out, I made the entire recipe totally wrong but what I got was a delicious recipe instead. In fact, it was the first thing Mr. E ever gave me a 10 for. (We do a numerical rating system when it comes to my cooking. I rarely get a 10 for reason I find pretty darn weird, but that's another story.)

So, I've made this a dozen times since! And it's delicious! Mr. E claims he can tell when I make it with anything besides the mixed cheese but I can't. He must jsut have a distinctive palate. I typically don't measure out the ingredients because it just tastes better when you add things based on taste, so my recipe is just a basic guideline. The amount I make always leaves enough for leftovers which are DELICIOUS! Just be aware that when you open up the sauce the next day the oil will separate from the cream. Just stir it back together and heat. Oh my goodness, it's heavenly.


Don't tell anyone, but I just had my third bowl.

Basil Cream Pasta

Ingredients:
  • Pasta of your choice (I recommend something tubular, it's always nice when you have something sauce can get trapped in! Also, just make however much you want. I usually make enough for three servings so Mr. E can have some the next day. Sometimes, I just make a whole box so we can both have some the next day.
  • 1 cup heavy cream (I promise this is something you can go a little less on. The whole sauce is based around how much cream you use so you may have to adjust the rest of the recipes based on how much cream you use.)
  • 8 oz. of shredded Italian Six-Cheese blend (This blend has mozzarella, provolone, asiago, parmesan, romano, and fontina. If you run out of the six-cheese blend, help yourself to whatever kind of Italian cheese you have lying around. But don't tell your husband, he'll be able to tell on his own later.)
  • 1-2 pinches of salt, this is based on taste. I usually put a little bit more in but I'm a salty person. Remember I mentioned this recipe not being for no/low sodium people?
  • 1/2-1 T. of dried basil leaves (I usually put a bit more in for this because I love the taste of dried basil)
Start making your pasta. I'm assuming you all out there know how to make pasta. If not, the instructions are on the side of the box. Start there. Just make sure you listen to Giada and REALLY salt the water. Remember, pasta has no taste so salt the water to bring flavor.

Pour cream into a small saucepan over medium heat. Once the cream is warm, not HOT, but warm (I just test with my finger, are you disgusted?) pour in your cheese and stir it slowly to move the cheese around as it melts. Once the cheese is melted, add the salt and basil. I think you should add it here because the basil taste really is able to soak into the cheese and sauce mix.

Once the pasta is finished cooking to your liking, drain and scoop the desired amount into your bowl. The sauce will thicken the longer you leave it on the heat so just leave until you are comfortable. Then pour over your pasta and ENJOY!

And don't email/text/facebook/comment/twitter me if you have a heart attack/stroke/pulmonary embolism/blood clot/constipation/diarrhea etc. While I don't expect any of these things to happen, I do expect extreme happiness after consuming.

It's a Miracle...Pancake

Mr. C is a delightful man. He's sweet, giving, and my perfect hubby. When it comes to cooking, he is always excited to eat whatever I've decided to make. He's pretty much game for anything (even my current attempt to feed him a 50% vegetarian meal plan). Well, almost anything. He hates pancakes. I mean absolutely despises them. He NEVER eats them. He complains that they are heavy and sit in his stomach for hours.

Imagine his surprise when he woke up one cold morning in January and I announced that we were having pancakes for breakfast. I told him I'd been looking through
The Pioneer Woman's cookbook and found an ol' cowboy recipe for sour cream pancakes that I really wanted to try.


I asked him to give me one shot at the recipe. If he didn't like them, I'd never make them ever again. He nervously agreed.

The recipe is super simple and comes together very quickly. The batter is very light and fluffy. It's made with a full cup of sour cream and very little flour. PW says to cook the pancakes on a buttered griddle. I'm always a non-stick spray type of girl, but I decided to throw cholesterol to the wind on this one and butter the griddle right up.


PW also says to cook the pancakes over med-low heat. If you do nothing else according to the recipe, obey this direction. The pancakes cook SUPER fast, only 60-90 seconds per side, at the low heat.


If you attempt to cook them on a higher heat, like I did with my first batch, they will burn. Like I said, if you do nothing else, obey the heat advisory.

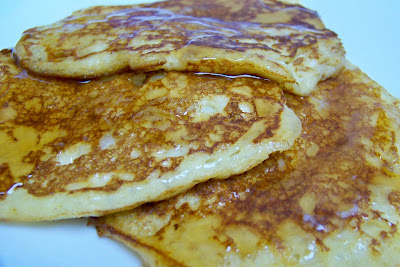
Look how fluffy those little beauties are!


I served Mr. C a small stack with some syrup.


He ate one bite...then another...and another. We had a pancake miracle!


He loved them. LOVED, LOVED, LOVED them!

Since Mr. C's brave venture in to pancake land back in January, we've had sour cream pancakes almost every weekend since. He even takes the leftovers to work for breakfast...if there are any left. I also served them to my mom and sis when they were visiting. They both loved them too--and my mom is not a breakfast eater. There is no other way to say it, these pancakes are just plain light, fluffy, and yummy.

I suggest you try them for breakfast as soon as possible.

Edna Mae's Sour Cream Pancakes
1 c sour cream
7 T flour
1 T sugar
1 t baking soda
1/2 salt
2 large eggs
1/2 t vanilla (although I use more)
butter
Place an iron skillet or griddle over medium-low heat. You want to get it nice and hot. Place the sour cream in a medium bowl. Dump in the flour, sugar, baking soda, and salt. Stir together very, very gently. Stop short of totally combining the mixture. Whisk the eggs in a separate bowl. Add the vanilla and stir to combine. Pour the egg mixture into the sour cream/flour mixture. Stir together gently. Don't worry about the mixture being totally combined, a little white and yellow swirl is fine. Melt about a tablespoon of butter in the skillet. Pour the batter into the skillet, 1/4 c. at a time. Cooke for 1 to 1 1/2 minutes, then flip. Cook for another 45 seconds and remove to a plate. Makes about 12 4-inch pancakes.

My side note: I have found that 1/4 c. of batter per pancake is WAY too much. Because these pancakes are so light and fluffy, they can be tough to flip. I measure my pancakes using a 2 T. measuring spoon. This makes a perfect size pancake and makes flipping more manageable...although they are still tougher to flip than a regular pancake. I get 12 pancakes exactly using the 2 T. measurement. Also, I always use fat free sour cream and it works great.

To say that we are buying sour cream in massive amounts is an understatement. When it goes on sale for 77 cents for a 16 ounce container, I buy at least 4 or 5. Next time I'm in the dairy aisle, I'll look for you. Once you try this recipe, you'll be there as often as I am!


I'm Finally Posting My First Recipe!

I have a confession to make. I set up this blog over a year ago. Oh, I had good intentions mind you. I was going to cook and blog...and blog and cook...all the while sharing my tasty finds with the world. Sadly, over a year later, no treasured recipes had made it to the blog. A couple of months ago my sister suggested that we share the blog and actually post on it. ACTUALLY POST ON MY BLOG? What a novel idea! Since I'm in Utah and she's in California, the blog is a great way for us to easily share recipes--and entice each other with photos. I've decided to get with the program and get cooking...and blogging. Actually, I've been cooking all along. I just need to work on the blogging part! Since this is my first post (all the others before this are courtesy of my very talented sister) I thought I'd start off with something over-the-top delicious!

I give you...drum roll please...DOUBLE BROWNIES!


Both Mr. C and I found these to be outrageously delicious! If you are a brown sugar fan like I am, you'll ESPECIALLY love them. I had a hard time not eating them--as you can see from the photo below. They had to be rapidly farmed out to the neighbors or Mr. C and I would have gobbled them all up. (Fortunately our neighbors, bishopric, and Mr. C's co-workers have willingly accepted the responsibility of eating my baked goods whenever called upon!) The recipe is from the Taste of Home Baking Book. I was looking for something I could make with supplies I already had on hand. This brownie ended up being a perfect choice.

The layers are delicious together. And the caramel frosting, OH THE FROSTING! It has an almost maple taste to it without having any maple extract in it. (Good thing too since Mr. C doesn't care for maple.)

I highly recommend you make a pan of these brownies right away. You won't be sorry! Oh, and please bring me one when you're done. I'd love a bite...or two...or six.

Double Brownies
Bottom layer:
1/2 c butter, softened
1 1/4 c packed brown sugar
2 eggs
2 t vanilla
1 1/2 c flour
1/4 t salt
1/2 c chopped walnuts
Middle layer:
1/2 c butter, softened
1 c sugar
2 eggs
3/4 c flour
1/4 c baking cocoa
1/8 t salt
1/2 chopped walnuts (I use pecans)
Caramel Icing:
6 T butter
3/4 c packed brown sugar
4-6 T milk
2 1/2 c powdered sugar
In a large mixing bowl, cream the butter and brown sugar until light and fluffy. Beat in eggs and vanilla. Combine flour and salt. Stir into creamed mixture. Stir in nuts. Spread into a greased 9 X 13 baking pan; set aside. For middle layer, cream butter and sugar until light and fluffy. Beat in eggs. Combine the flour, cocoa, and salt. Stir into creamed mixture. Add nuts. Spread over bottom layer. Bake at 350 degrees for 35-40 minutes. Cool completely on wire rack. For icing, melt butter in a saucepan over medium heat. Stir in brown sugar and milk; bring to a boil. Remove from heat. Cool just until warm; beat in powdered sugar until the icing achieves spreading consistency. Spread over brownies. Let stand until set. Cut into 24 bars.

One side note: Mr. C and I did keep a few of these tasty treats for his lunches. We found that after about 3 days they were stale and rather flavorless. I kept them in a covered container, but I'd say they have a lifespan of about 2-3 days.

P.S. Welcome to everyone who attends my classes at the Little Theater!

Paula Deen Raspberry Limeade Cake


I made this incredible cake for Mother's Day and it was a hit! I loved it and so did everyone else! I may have even eaten the leftovers for breakfast yesterday! When I first thought of making the cake I thought it looked too advanced but in reality it is just a basic cake and filling recipe. The filling was amazing and I loved the idea of using limeade concentrate and lime zest in the cake batter, however, I didn't find the finished cake to be very moist. (The actual cake layers, I mean.) They weren't too dry but just not as moist as I would have liked. I think you could probably use a basic yellow or white cake mix from a box and exchange out the water for limeade. This particular cake recipe called for buttermilk but I don't think a buttermilk cake is necessary. One tip I would really give is to make sure your cake is completely cooled before you remove it from your pan. You cook three cakes in three round cake pans but I only had two, so I had to hurry and remove a warm one to cook my last cake. Removing the cake before it is completely cool can cause more of the cake to fall apart so let the cake cool completely. The one cake I let cool all the way was the most beautiful layer! So, either let everything cool or invest in three cake pans.

Also, I made this cake over two days but you could easily make it in one day. If you plan on doing that, I would make the filling first, because it needs time to cool in the fridge. Then make your cakes. If you are going to cook all your cakes at once, make sure you rotate them in the oven to ensure even baking. Then, after they are cool, put the filling on and then make your icing. Oh, the icing...it's delicious. I could have eaten it straight out of the bowl. It does come out a little thick and hard so I might let it sit on the counter for a short time, maybe 5 minutes, before frosting.

And last but not least, DO A CRUMB LAYER! I was surprised that my husband and Mom didn't know what a crumb layer was, but DO IT! A crumb layer is the first layer of frosting you put on. Take a huge chunk of frosting and slap it on your cake. Don't go back in to the main frosting bowl for more. If you need to, put the frosting for your crumb layer in a separate bowl. Then, start your crumb layer. Put a thin lining of frosting on, not as thick as the final project will be. This crumb layer will look slightly messy. It will have crumbs and filling all mixed in. (Although, I have to admit, some of the red frosting mixed in looked pretty.) Then, put it in the fridge for 15-20 minutes. This allows that portion of the frosting to harden, sealing in the crumbs so the final product is clean on the outside. Once, the time is up, frost the rest of the cake and garnish with lime slices and raspberries.


Ingredients:

  • 3/4 c. butter softened
  • 2 cups sugar
  • 1 tbs lime zest
  • 3/4 c. limeade concentrate
  • 5 large eggs
  • 3 3/4 c. all-purpose flour
  • 2 3/4 tsp baking powder
  • 1 1/2 c. whole buttermilk
  • raspberry filling (see below)
  • cream cheese icing (see below)
  • garnish of lime slices and whole raspberries

Instructions:

Preheat over to 350 degrees F, spray three 9 inch round cake pans with non-stick cooking spray.

In a large bowl beat butter, sugar and lime zest at medium speed with an electric mixer until fluffy. Add limeade concentrate, beating until combined (mixture will look curdled). Add eggs, one at a time, beating well after each addition.

In a medium bowl combine flour and baking powder. Gradually add to butter mixture, alternately with buttermilk, beginning and ending with flour mixture, beating just enough to combine after each addition.

Pour batter evenly into prepared pans and bake for 17-20 minutes until wooden skewer comes out clean from center. Let cool in pans for 10 minutes once finished baking and then remove cakes from pans. Allow to cool completely on wire racks.

Once cooled, spread raspberry filling evenly between layers and ice with cream cheese frosting. Garnish as desired.


Raspberry Filling

Ingredients:

  • 1 (10 oz.) package of frozen raspberries
  • 1/2 c. sugar
  • 2 tbs cornstarch
  • 3 egg yolks
  • 1 tbs fresh lemon juice
  • 1/4 c. butter cut in pieces

Instructions:

Blend raspberries until smooth in a food processor. Strain mixture and discard solids.

In a medium saucepan, combine sugar and cornstarch. Add raspberry puree, egg yolks, and lemon juice, whisking to combine.

Cook over medium heat whisking constantly, for 7 to 8 minutes or until very thick. Remove from heat, whisk in butter gradually until melted.

Cool mixture slightly then cover and refrigerate for at least 2 hours.


Cream Cheese-Limeade Icing

Ingredients:

  • 1 (8 oz.) package of cream cheese, softened
  • 1/2 c. butter, softened
  • 3 tbs limeade concentrate
  • 1 tbs lime zest
  • 5 c. confectioners’ sugar

Instructions:

In a large bowl, beat cream cheese and butter at medium-high speed with an electric mixer until creamy. Add limeade concentrate and lime zest, beating at low speed until combined. Gradually add confectioners’ sugar, beating until smooth.