Monday, April 18, 2011

Finally, something that worked

Last weekend...and the weekend before...I had grand plans to cook something new and exciting every day and put up lots and lots of blog posts.

Didn't happen

So then I scrapped the idea of lots and lots of blog posts and just stuck with cooking something new and exciting every weekend day.

That DID happen.

What didn't happen was having all those new and exciting things turn out so fabulous and delicious they were worthy of blog posts.

I'm not sure what has happened, but I have been in a downward cooking spiral lately. It seems like everything I've been attempting to make turns out to be disasterous in the process or less than thrilling in taste...assuming I actually got it to work. Not only that, poor Mr. C fell victim to my disasterous cooking spree when I accidentally hit a measuring cup full of boiling water as I was pulling it out of the microwave. The mini flood landed in a pan of oil he was using to fry up some tortillas.

Oil burn. NICE!

That was it...the final straw. I said right then and there, "I am not going to cook anymore. Nothing is working for me lately." Good thing I have a few recipes in my "to be posted" computer file. Since strawberries are starting to fill the grocery store shelves, and prices are finally coming down (unlike everything else at the grocery store), how about if we stroll down strawberry lane with "Strawberries and Cream on a Cloud."

Mr. C chose this recipe for our Sunday dessert a couple weeks ago. It's one I got at a class I attended a long time ago at Thanksgiving Point (long before I became Mrs. C)--back when the classes there weren't almost 50.00 each. I wish I could remember the teacher's name, but I can't. (I think it might have been Lori Bennett.)

Without question, the best part of this recipe is the "Creme Anglaise" that is drizzled (or in my case, POURED) over the top. It's absolute edible ecstacy. Take a look at the recipe and then we'll chat about some of the changes I made to the recipe.

Strawberries and Cream on a Cloud
Strawberries:
8 c sliced strawberries
2 T sugar
2 T orange juice
1 t grated orange rind
Cake:
3/4 c slivered almonds
2 T sugar
1 c cake flour
1/2 c powdered sugar
1/2 t salt
10 large egg whites (save 8 of the yolks for later)
1 1/4 t cream of tartar
3/4 c sugar
1 1/2 t almond extract
Creme Anglaise:
2/3 c sugar
8 large egg yolks
3 1/2 c 1% milk
1 T vanilla
Preheat oven to 325 degrees. To prepare strawberries, combine ingredients in a bowl. Cover and chill 3 hours. To prepare cake, place almonds and 2 T sugar in a food processor; pulse until finely chopped. Sift together cake flour, powdered sugar, and salt in to a bowl. Combine the almond mixture with flour mixture, set aside. In the large bowl of a mixer, beat egg whites at high speed until foamy. Add cream of tartar; beat until soft peaks form. Add granulated sugar, 1 tablespoon at a time, beating until stiff peaks form. Sprinkle flour mixture over egg white mixture, folding it in 1/4 c at a time. Fold in almond extract. Spoon the batter into an ungreased 10-inch fluted/bundt pan and spread evenly. Bake at 325 degrees for 1 hour or until the cake springs back when lightly touched. While the cake is baking, prepare the creme anglaise. Combine the sugar and egg yolks in a large saucepan, stirring with a whisk until blended. Gradually add milk to the pan, stirring constantly with a whisk. Cook over medium heat until mixture coats the back of a spoon (about 8 minutes), stirring constantly. Immediately pour mixture into a bowl; stir in vanilla. Cover and chill. (The mixture will thicken as it cools.) When cake is done baking, turn the pan upside down and cool 40 minutes. Loosen cake from sides of pan using a narrow metal spatula. Invert cake onto plate. Serve with strawberries and creme anglaise.

Are you salivating yet? You should be. If nothing else, the creme anglaise is worth drooling over.

Let's talk about a couple changes I made. First, I used orange juice concentrate instead of regular orange juice for my berries. I don't recommend doing that. It was too strong. Because I love the almond and vanilla flavors in the other elements of the recipe so much, the super strong orange taste was just a bit too overpowering. Next time, I'll use plain juice.

Second, I didn't have any slivered almonds for the cake so I used sliced. The substitution worked just fine. The cake is nothing more that homemade angel food cake with finely chopped nuts added. If you don't want to go to the effort of making homemade angel food cake, just buy one. However, after trying my friend Cindy's homemade version a couple years ago, I'll never buy a store bought one again. The freshness of homemade just can't be beat. If you're never tried homemade, try it just once...for me. The cake is relatively easy to make. It takes a little patience to go from this... ...to this... ...but it is OH SO WORTH IT! The cake needs to be inverted while it cools. Since an angel food cake/fluted pan has a hole in the middle, I prop mine on top of one of my vinegar bottles.

It'a a great little set up.

The last changes I made were in the creme. The recipe calls for 1% milk. I never have that on hand since all we drink is skim. I used skim and didn't really have any issues other than timing. The original recipe says it takes about 8 minutes for the creme to become thick enough to coat the back of a spoon, but mine too MUCH longer--probably twice that. Whether or not that was caused by the lack of fat content in the milk, I don't know. Either way, everything tasted just fine in the end. Also, I added a teaspoon of almond extract to the creme in addition to the tablespoon of the vanilla. As I mentioned in my last post, Mr. C is so enthralled with almond extract, I knew he'd go crazy for it. And he did! (To be honest, so did I!) It's a great addition to the creme, so I'll make it a permanent part of the recipe from now on.

As you can see, we didn't exactly drizzle the creme on. With something that delectible, more is definately better!

One of the nice things about this dessert is that all the components save for several days so it is one you can enjoy over and over. We ran out of berries before anything else. In fact, I still have creme in the fridge and half the cake is chillin' in the freezer for now.

I think I see a trifle coming!

Friday, March 11, 2011

If I add almond, he will come

Mr. C loves a lot things. . .popcorn, the Military channel, fried chicken, a good book, movies, and black licorice--to name just a few. Right up near the top of his list of favorite things is almond extract. He loves it. I mean LOVES it. (I swear I could boil a pot of water, drop in some almond extract, and he'd gobble it up.) So, when it came time to choose our Sunday evening dessert a couple months ago (from the giant bag of untried dessert recipes), you can imagine my lack of surprise when he chose "Almond Poppy Seed Bars" from a past issue of Paula Deen's magazine.

Sometimes I get a little burned out on poppy seed recipes since they became so trendy years ago with muffins, breads, and salad dressings. It's not that they don't taste good--don't get me wrong. It's just that I often find them unoriginal. Nevertheless, Mr. C saw the word almond in the title during his dessert search and that was all it took.


The recipe is very easy to follow and put together. Take a look at it and then I'll add a couple personal notes on the flip side.

Almond Poppy Seed Bars
Bars:
2 1/4 c sugar
1 1/2 c milk
1 c oil
3 large eggs
1 T vanilla extract
1 1/2 t almond extract
3 c flour
4 1/2 t poppy seeds
1 1/2 t baking powder
1/2 t salt
Frosting:
3 c powdered sugar
1/3 c butter, melted
3 T milk
Preheat oven to 350 degrees. Lightly grease a 12 X 17 X 1 baking pan. In a large bowl, beat sugar, milk, oil, eggs, vanilla, and almond extract at medium speed with an electric mixer until smooth. In a medium bowl, combine flour, poppy seeds, baking powder, and salt. Gradually add to sugar mixture, beating until combined; spoon into prepared pan. Bake for 25 minutes or until a wooden pick inserted in center comes out clean. Cool until slightly warm. For frosting, combine all ingredients and beat at low speed with an electric mixture until smooth. Spread frosting over warm cake. Cut in to squares and serve.

In making my bars, I changed two things from the original recipe. First, the original recipe says to use a 10 X 15 pan. I tried that, but it was way too small. The pan was not big enough to hold all the batter. I bumped up to a 12 X 17 (make sure your pan has an edge!) and that was large enough. The other change I had to make was the cooking time. The original recipe says 20-25 min. I had to go 28 minutes. My convection oven can sometimes have issues with cakes, so that's why I listed a bake time of 25 minutes above. You might be able to go as short as 20 minutes, but I'd guess you'll need at least 25.


Just a word about the frosting. There was PLENTY. In fact, there was almost too much for me because the bars are not very thick. But, I will be the first to admit that I am not a powdered sugar glaze/frosting girl. (I feel like no matter what you do, it always tastes like powdered sugar.) I did add a bit of almond extract to my frosting for both my and Mr. C's benefit. Had the cake been in the 10 X 15 pan, there would have been too much frosting for me for sure.

One side note about poppy seeds. I highly recommend that you do NOT buy a small bottle from the spice section of your grocery store. Poppy seeds are WAY WAY WAY too expensive when you buy them in that packaging. If you can buy them in bulk, it's the best way to go. My brother-in-law works for Honeyville Grain, so I buy mine there. Honeyville offers a great price for a good quantity of seeds. If you don't have access to a bulk buying option, swing by the bakery counter of your local grocery store. Bakeries will sell you items like seeds (poppy or sesame) or sprinkles (yes, they are cheaper than the bottles too!) used in making their own baked products. You'll save a lot by purchasing your seeds (and sprinkles) this way.

Overall, we really liked this recipe. (It's being given a permanent home in my recipe binder.) After baking up the bars are more like a cake, but they are flavorful and moist no matter how you classify them. If you need a quick and easy dessert, or want to try something new and different, you won't go wrong with this one!

Saturday, February 12, 2011

Does it really work?

I hate to throw away food. I hate, hate, hate it. I feel like I might as well drop cash in the garbage.

I recently opened my veggie crisper to find that I had let a stalk of celery age past it's prime. DARN IT! I get so annoyed with myself when I let that happen. Then I remembered reading online somewhere that you can soak stalks of celery in water for 24 hours to rehydrate and revitalize them.

I decided to give it a try:


So...does it really work?

For me, yes and no. Ultimately my stalks were returned to a fair amount of firmness, but I had to let them soak in the water for three days, not one. The stalks weren't super crispy as if they were fresh from the grocery store, but they were firm enough I was able to use them in a couple recipes.

Would I do it again? Probably not. I think I'll just try harder not to let the celery get soft!

Thursday, February 10, 2011

Valentine's Day is coming...bring on the chocolate!

I know it's stereotypical to think that all women love chocolate, but they don't. I have two neighbors that despise it and WILL NOT eat it in any form or recipe. May I say, however, that I am NOT one of those people. I love chocolate. I mean I love, love, love chocolate...especially dark chocolate. I will eat it in cake, brownies, candy, fondue, and dip. Simply put, I LOVE CHOCOLATE!!!

Ever since I was young (yes, that means for a LONG time), I have had a love affair with chocolate mousse. I don't know why. I don't know how it started. But, whenever I'm asked what my favorite dessert is, it's not uncommon to answer "chocolate mousse." (I actually have a lot of favorites. I can never narrow my favorites down to one.) I can remember going to Sunday brunches and always going straight to the always dainty pedestal glasses of chocolate mousse before anything else. MMMMM! Just thinking about a dish of that smooth, creamy, rich, decadent dessert is making my mouth water!

Several years ago during a routine trip to the grocery store, I noticed some recipe cards available for the taking on a service counter. (How could I not grab a couple???) One of the recipes was for....cue the angelic chorus now...CHOCOLATE MOUSSE. Since I'd never attempted to make this delicacy myself, I grabbed a card and told myself that I would, indeed, someday, make a big ol' bowl of long time favorite dessert. I tucked the card away awaiting the perfect moment to pull it out.

And then it arrived...VALENTINE'S DAY! The holiday of love, delicious dinners, and chocolate! Mr. C and I talked it over and decided this was the perfect opportunity to pull out the chocolate mousse recipe and GO FOR IT!

On a personal note, let me just say how bizarre it was when Mr. C and I were dating to discover that his favorite dessert is also chocolate mousse. I'd never met anyone else who loves as much as I do. Not only does he love chocolate mousse, he loves Idaho Spud candy bars like I do. I didn't even know anyone else knew they existed. OK, enough of the goofy personal stuff. Time to get back to the pressing matter at hand...mousse!

The mousse came together so quick and easy. I was shocked at how simple it was to make. Then again, how could it not be when it only has 4 ingredients? Let's take a look at the recipe and we'll talk about it on the flip side:

Chocolate Mousse
8.8 oz fine Belgian dark chocolate
6 egg whites
1/2 c sugar
1 2/3 c cream
Melt chocolate. Slightly beat egg whites; add sugar then beat mixture until stiff. In a separate bowl, beat cream until soft peaks form. Fold egg whites in to the melted chocolate. Fold in the cream. Chill until ready to serve. Serves 10-12. The mousse can be served with whipped topping, berries, and/or chocolate shavings on top.

How simple is that!

Now a couple personal notes. First, for the chocolate in the recipe we used the Hageland chocolate that I refer to
here. It is inexpensive and delicious. In my cooking classes I always say, "You get what you pay for when it comes to chocolate, so don't scrimp." I don't think you have to break the bank, but buy some good chocolate. Don't just pull out the bag of chocolate chips. Second, if you are saying, "But Jackie, I HATE dark chocolate," don't worry. Mr. C despises it with a passion I cannot describe to you here. This recipe has enough sugar and cream in it to ease what some consider bitterness in dark chocolate. The dark chocolate makes the mousse rich, but not bitter. Finally, unless you're feeding a crowd, you may want to cut the recipe in half. When it says "serves 10-12," it's not kidding. The recipe made A LOT. We ate it bit by bit for about a week.

Since Valentine's Day will be here in just a few short days, why not whip up a bowl for you and your sweetheart--or, just for you if you prefer. I'm not opposed to a bowl of my own, a spoon, and a comfy couch!

Sunday, October 3, 2010

banana stuffed french toast with blueberry compote

every april and october, our church has a general conference where we have the opportunity to hear from our church leaders. i love it for many reasons, one of them being it's a perfect opportunity to watch church in your pajamas. ever since being married, i've always tried to make it a tradition to make two new, fun breakfast items for saturday and sunday. this year, sunday was banana stuffed french toast with blueberry compote.

we first saw this made on diners, drive ins, and dives on food network. it was from a restaurant in florida and when mr. e saw it he began to drool and said to me..."let's make that.....pul-eeze?" however, when i printed the recipe it came with the disclaimer that the recipe had been reduced down from a bulk recipe and had not been tested by the food network kitchens so...good luck, basically. as i read through the recipe i decided to make a few changes. one, the original recipe calls for bananas cooked in butter and brown sugar but i'm not really a fan of cooked bananas, so i decided to just cut them up and put the in between the bread slices. also, the original recipe called for challah bread. well, if you can find challah bread--be my guest. i ended up using some soft french bread. also, i skipped mixing the cooked bananas in with the cream cheese--but that was only because i didn't have any. darn, that would have tasted good.

also, the original recipe called for 1 gallon of eggs. um, did you know that is 128 ounces? well, i was cutting the recipe in half anyway, but still! that is 64 ounces of eggs! you know, 5 eggs worked JUST FINE. sheesh food network, do you think i have all the money in the world to go buy 6 dozen eggs...WELL, I DON'T!

my modifications were few but this recipe was incredible. especially the blueberry compote. it makes a TON of compote, and i mean a TON. we will probably have it for weeks to come. i don't care. i plan to put it on oatmeal, ice cream, hamburgers, tuna sandwiches. anything. it's delicious.

without further ado, here's the recipe.
banana stuffed french toast with blueberry compote
based on this recipe

2 bananas, cut into 1/2 in. slices
fresh challah bread, or soft french bread, cut into 1 inch slices
5 eggs (or 1 gallon if you are crazy)
1/2 c. half and half
about 1 t. of nutmeg
about 1 t. of cinnamon
1/2 c. sugar
16 oz. frozen blueberries
1/2 c. water
1 c. brown sugar (now you know it's good)
1/2 c. water + 1/4 c. cornstarch
16 oz. frozen strawberries

put a couple slices of banana onto a piece of bread and then sandwich with another piece of bread. push it down a little bit to get the banana to kind of soak into the bread. mix the eggs, half and half, nutmeg, cinnamon, and sugar in a bowl. heat a large skillet, sprayed with nonstick spray or use butter, over medium heat. squish the sandwiches one more time and then dunk in the batter. pan fry on all sides. keep warm.

(i really recommend having everything for the compote ready to go before you start cooking your french toast. since the blueberries have been frozen they are going to take a long time to get to a boil. so, start your compote at the same time as you start frying your french toast.)


blueberry strawberry compote
put the blueberries, water and brown sugar in a saute pan (i used a sauce pan) over medium heat. bring to a boil and add the cornstarch/water slurry mix. cook until the sauce becomes thick and coats the back of a spoon (fyi, that won't take long. once it is super thick, you are going to want to swim in it. refrain. it will be REALLY hot.) add the strawberries and cook for 1 minute.

once your french toast is cooked, put on a plate and spoon compote over the top of your bread. then sprinkle some powdered sugar. enjoy!


Wednesday, September 29, 2010

A new twist on zucchini bread

Time for a true story. Ready? Three years ago at a family reunion, several of my aunts and uncles were sitting around telling old family tales when the subject of zucchini came up. (Don't ask me how!) One of my uncles burst in to laughter saying, "Do you guys remember that mom always had zucchini frozen in the freezer? Who on earth freezes zucchini?" Laughter erupted again. Imagine my uncle's surprise when I raised my hand and said with a slight touch of embarrassment, "I have a bunch of zucchini in my freezer right now." He was shocked. He could not understand why someone would freeze something that is so easy to find at the store...not to mention its abundance once neighbors start to farm out their extra garden bounty.

Fast forward 3 years to this past May. As some of you know, I have a neighbor who graciously offered to share her large garden area with me this summer and teach me the art of gardening. There was no question that zucchini would one of the adventures I'd undertake. With great excitement...and visions of bread, muffins, and cakes...I planted 2 mounds of zucchini with 6 seeds in each mound. I told the seeds that if they'd grow nice and big, I promised to turn their hard work in to lots of yummy things.

Fast forward, again, to about a two months ago. The seeds did their part in producing nice big plants...thank you peat moss! However, because the garden is not right outside my back door, I don't check it as often as I should. What happens, you may ask, to nice large zucchini plants that do not get checked on a regular basis? I give you exhibit A:


Exhibit B:


And exhibit C:


Yes, yes, I know. Someone needs to pick the zucchini more often! Most of those zucchinis are close to 2 feet long and between 5 and 6 inches in diameter.

I realize that for most people who grow zucchini consider those baseball bat size squashes to be complete failures. NOT ME! When I see those monsters, I know it's time to pull out my food processor and freezer bags. WOO HOO! I spent a couple hours a couple months ago shredding up all the giant squashes I had and ended up with 40...YES 40!...cups of shredded zucchini.

And you know where most of it went?


Yes indeed, right in to my freezer! (My uncle would be so proud!)

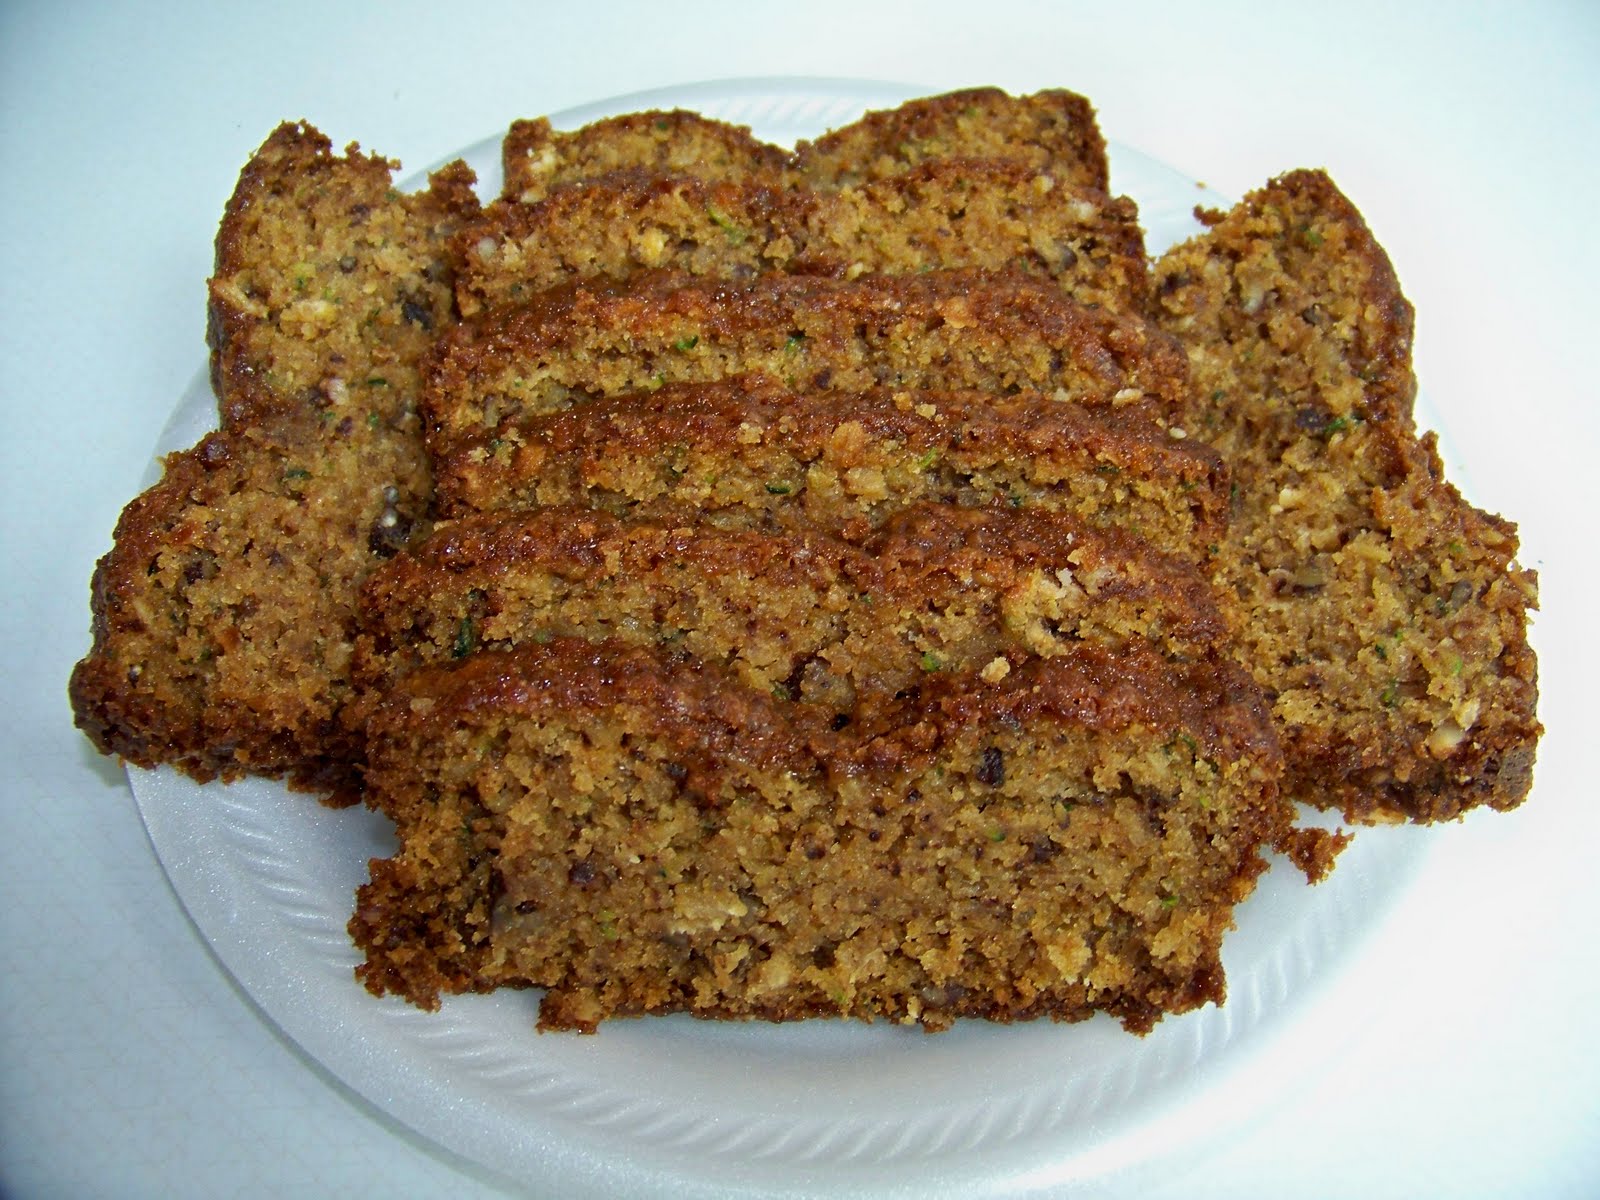
Even though most of the shredded goodness ended up in my freezer, I did take advantage of my abundant supply by trying a recipe I've had kicking around in my "try this" recipe pile for about two years. Instead of a basic zucchini bread, this recipe is made with a box of butterscotch pudding. I'm not sure where the recipe came from (or I'd reference it for you), but whoever created it deserves two thumbs up!

Butterscotch Zucchini Bread
3 eggs
1 c oil
2 t vanilla
2 c sugar
2 c grated zucchini
2 c flour
1 t baking soda
1 t salt
1 t cinnamon
1/2 t ginger
1/2 t nutmeg
1/4 t baking powder
1/2 rolled oats
1 sm pkg butterscotch pudding
1 c nuts, raisins, or dates (optional)
Mix bread ingredients. Pour in 2 large greased, floured, wax paper lined loaf pans. Bake 1 hour at 350 degrees.

As far as the pudding goes, I've used regular once or twice, but I typically have sugar-free on hand and use it most often. The sugar-free does not seem to impact the bread in any way, so I say use it if that's what you have. I find that butterscotch can often be an overwhelming flavor. However, you don't have to worry about that here. The pudding simply adds a great deal of moisture to the bread without overpowering it with butterscotch flavor. Also, the first time or two I made the recipe I included the nuts. I've stopped doing that. I'm convinced that 99% of the time when a recipe says "nuts optional" they should be used, but not in this instance. The bread is so moist, the nuts get lost in it. With pecans nearing $5.50 a pound these days, they are wasted here.

I've made this recipe as a treat for my neighbors (hence the small plates of slices) and as a refreshment for a class I went to. It's been a huge hit each and every time! If you are fortunate to have a bounty of zucchini from your own garden, if you have to buy some at your local grocery store, or if you need to come raid my freezer, try this recipe. You won't be disappointed!

SIDE NOTE: I gave this recipe out at a class I went to. If you picked up the recipe at that class, I sadly forgot the cinnamon when wrote it down. The recipe really needs the cinnamon, so please add it to the recipe you have!

SIDE NOTE #2: I took 3 huge zucchinis to my family in California last week. My sister, and blog partner, now has 26 cups of shredded zucchini in her freezer! How hilarious is that!

SIDE NOTE #3: With the rest of the 40 cups that I did not freeze, I made mini loaves of pumpkin zucchini bread for Mr. C to take as Christmas gifts to families in the neighborhood he visits. My freezer currently runneth over!


Wednesday, August 4, 2010

What's in this cookie?

I don't know if you're like me or not, but I love to take fun treats to take with me when I go places--like to a dentist appointment or a church meeting. It's always nice to surprise a group of people with an unexpected goodie! And nothing brings a smile to some one's face quicker than a plate of cookies. Brownies? Sometimes. Chocolate? Oh baby! But still, there is something about a plate of cookies that warms the heart, fills the belly, and feeds the soul.

Several years ago a friend of mine shared some cookies with me that I had never enjoyed the likes of before. I loved them, but couldn't pinpoint the flavor. I finally had to ask, "What is in this cookie?" When she told me the special ingredient, I recognized it right away and kicked myself for not realizing it sooner. Since that day, I've made this cookie recipe countless times. (It was one of the first things I taught in a cooking class!) When I wanted to take a couple containers of treats to a church meeting a couple weeks ago, this cookies seemed a perfect choice. As I watched those at the meeting munch and smile and munch and smile, I was a happy gal. But, as it always happens with this recipe, I didn't leave that night without someone saying to me, "What's in this cookie?"

(Once again, please pardon the odd blue tint that comes from the so called "natural sunlight" bulbs in my kitchen.)

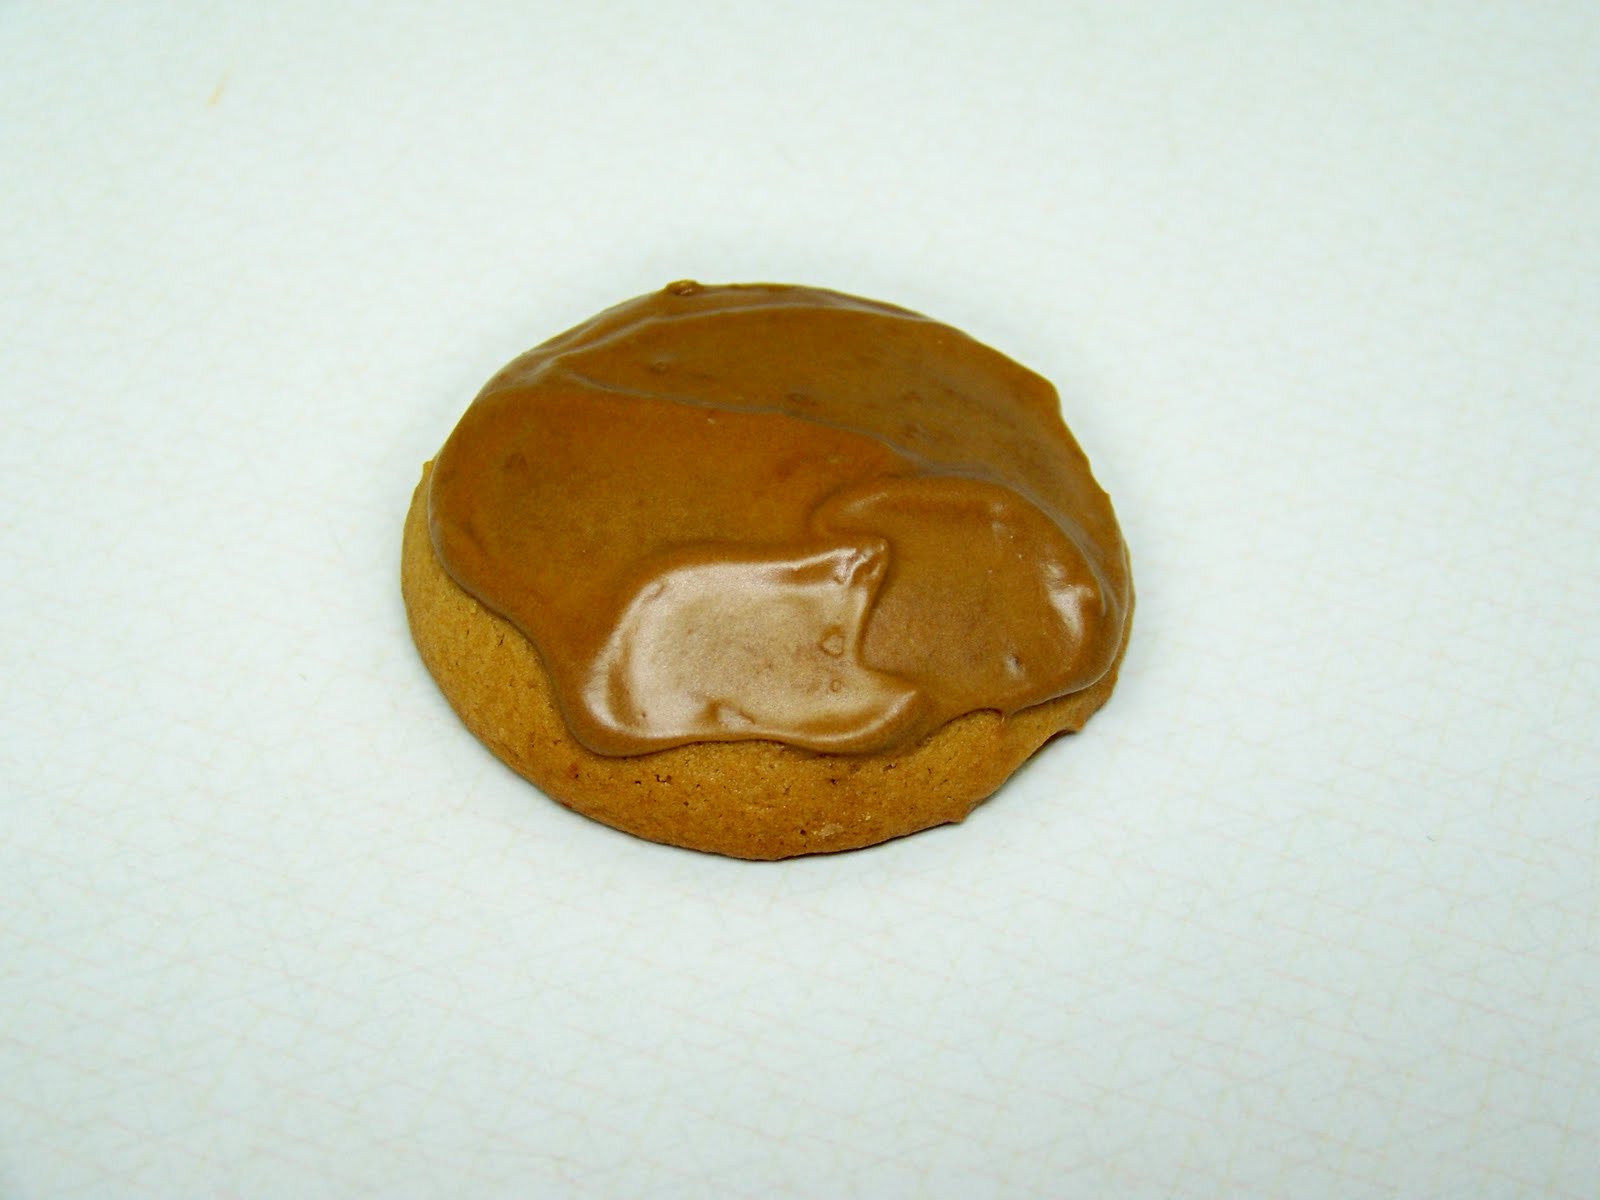
This recipe came from my friend Cheryl who got it directly from the cafeteria at the Jordan River Temple. She and her husband always enjoyed the cookie there, so she asked for the recipe. What is the secret ingredient in this ever-popular goodie you may be asking? The secret, my friends, is ROOT BEER!

No...no...no...we're not talking a can of soda here. We are talking extract or concentrate. You know, the stuff that's on sale at your local grocery store during the summer because everyone is making homemade root beer!

In all the times I've made this recipe, I've always used root beer concentrate from the grocery store. I'd heard of root beer extract, but I'd never seen it. Never, that is, until I entered kitchen heaven a few months ago. (If you live in the Salt Lake area, or anywhere within driving distance, I suggest you get in your car and drive there immediately.) I decided to buy the extract and give it a try. The cost was more than the concentrate, but I bought it hoping the flavor would be stronger than the concentrate and worth the extra dollars.

It wasn't...on either account. The flavor level was exactly the same. Want my advice? Don't pay the extra for the extract. Just stock up on the concentrate during the summer when it's on sale and you'll be fine. (As a side note, contrary to popular belief there is no cocoa in this recipe. The color comes from the concentrate.)

Let's take a look at the recipe and we'll chat about it on the flip side.

Root Beer Cookies (makes 6 dozen)
1 c butter
2 c brown sugar
1 c buttermilk (I always use powdered)
2 1/2 (3) t root beer extract or concentrate
2 eggs
1 t salt
1 t baking soda
4 c flour (you may need more)
Frosting:
1/3-1/2 c butter
3 c powdered sugar
3 T water
2 1/2 (4) t root beer extract or concentrate
Cream together the butter and brown sugar. Add the buttermilk, extract, and eggs. Mix. Add the salt, baking soda, and flour. Mix well. If the dough is sticky, add more flour. Drop by rounded tablespoons on to a baking sheet. Bake for 10 minutes at 375 degrees. For frosting, mix all ingredients together until you get the consistency you want. Frost cookies when they are cool.

OK, now that you know what's in the recipe, let's talk about a few things.

First, the flour. You will, most likely, have to add extra. I've added up to 3/4 c. extra before. The dough should not be overly sticky. If you find your in the sticky zone, add extra bit by bit until you get a texture that is a lot like what you'd get with a basic drop/chocolate chip type dough.


The cookies should bake up puffy and soft. Try baking one or two alone. If they don't puff up, consider adding a bit more flour.


Second, the buttermilk. Basically, DO NOT leave it out and DO NOT try to substitute regular milk. I have accidentally done the former and the cookies were flat as pancakes. My sister tried the latter and the cookies were a miserable failure. I always cook with powdered buttermilk simply from a money-saving consumer aspect. It works great in this recipe. Whether you use fresh or powdered, it doesn't matter. Just use it!

Third, the concentrate. I've given you the amount called for in the original recipe and my own personal preference in parenthesis. I find that the lesser amounts of concentrate are just not enough. I want to be able to taste the root beer. I don't need to feel like I'm guzzling a cold frosty mug of it, but I want to taste the flavor of it. I suggest tasting the frosting before you top the cookies and making sure you're comfortable with the flavor level. Start small so you can add more if you're not happy. But, I'd be surprised if you didn't end up at the higher amount. I don't ever taste the dough. I'd just add the extra to the batter.

Speaking of batter, that leads us to number four. The actual cookie in and of itself is surprisingly low on flavor. (This is why I do not hesitate to add the extra concentrate to the batter.) The frosting really makes this cookie so DO NOT LEAVE IT OFF. My sister tried that too and won't do it again.

How about one more glance at this tasty treat!

Isn't it pretty! This recipe makes a lot of cookies, so it's great for sharing at work, church, or just brightening the day of your friends and neighbors. Make a batch. Eat some and then pass some around. And don't worry, it won't be long until you'll be hearing that ever popular inquiry, "What's in this cookie?"!

P.S. Is it just me or did you also not reazlize "root beer" is two words not one? Thank you spell check!

Tuesday, July 13, 2010

Lemon Cookies


Not so long ago, I was but a single maiden living in Provo, Utah living with five other single maidens. (Let me tell you, living with five single maidens is not fun. TOO. MUCH. DRAMA.) Down the street from our single maiden apartment was a cookie shop where they would make bouquets of baked goods and deliver. However, you could also go in and buy cookies. I had one roommate who was a big fan of their lemon cookies. They only had them close to the summer but when they had them she went sometimes once a day. (Let me interject here to say this particular roommate was a RAIL. I mean stick thin. She only ate dessert once a day, which to mean sounds inhuman, so you know that the dessert she ate had to be good.) She always wanted to find a recipe for lemon cookies that was just as good as the ones from the cookie shop.

Fast forward to my dear sister, Jackie's, Christmas cookie party. At these cookie party , the winning cookie was none other than a delicious lemon cookie. I took the recipe home to my roommate and we decided to make them. My roommate loved these cookies, in fact I made them for a bridal shower I hosted for her a few months after. Once I was a married maiden I made them for a party with my husband's family and for all the parties after that it was requested that I bring these cookies, with the recipe attached.

These cookies are amazing. They taste just like summer. They are heaven and what makes them so great is how easy they are to make. The recipe suggests putting the glaze on once the cookies have cooled but I like putting it on while they are still warm because it melts into the cookie a little bit adding another layer of flavor. Also, the recipe for the glaze calls for a little lemon zest to act as a little decoration on the top which is completely optional. In fact, I can say with 100% honesty, I've never done it.

These are the PERFECT addition to your summer parties!!!!

Lemon Cookies
Makes A LOT depending upon the size of your dough balls

Cookies:
3/4 c. shortening (not butter shortening)
1 c. sugar
3 eggs
2 pkgs. (9 oz.) instant lemon pudding
2 c. flour
1/4 t. salt
3/4 t. soda

Glaze:
1 1/2 T. milk
1 T. butter
1 1/4 c. powdered sugar
1 T. lemon juice
1/2 t. grated lemon

Cream shortening and sugar, add eggs and beat. Add pudding (dry mix) and dry ingredients. Mix well, roll into balls. Bake at 375 degrees for 8-10 minutes.

For glaze: melt butter with milk in a pan. Take off heat and stir in powdered sugar--wisk until smooth. Add lemon juice and rind--wisk. Spoon over the tops of warm or cooled cookies. (***Note: this is NOT a lot of glaze so make sure you don't go crazy with the glaze on the first batch. You only need a small amount per glaze as the glaze spreads a ton! Also, make sure you taste your glaze so you know how much powdered sugar and lemon you like best. I like to test and add either lemon or sugar depending on the flavor I like.)

Monday, July 12, 2010

Peanut Butter Krispie Bars

There are a few combinations that I am sure were just MFEO (made for each other). Some of these would be french fries and ranch dressing, lobster and butter, and Mr. E and me. But, the combination that I am so sure was destined for greatness is peanut butter and chocolate. I will eat anything that has peanut butter and chocolate. In fact, I'd probably eat it on chicken, in soup, in a box, with a fox, and wearing socks. It's heaven. Heaven.

Did I mention that chocolate and peanut butter are heaven? Because, they are.

I was excited to find this new recipe in the newest issue of Everyday Food. It was the final recipe and in my mind, they saved the very best for last. I decided to make some to give to my husband as he attended to his ecclesiastical duties in visiting some families.

These are really delicious but there is only one thing I would change...MORE CHOCOLATE. The recipe originally called for one bag which you put between the layers of the rice krispies and then a thin layer on top but this recipe needs a TON more. A TON. In fact, add three bags if you really need it and please, while the recipe called for semi-sweet chocolates, use milk chocolates. Semi-sweet chocolate just seems unnatural.


If you are curious what I really added to this recipe it would be the use of the foil (or you could use parchment paper) in he dish. I put the foil in so that there was a could couple of inches hanging over the sides. This way, when I went to pull the dish and cut it in to the bars I was didn't have to try to work around the sides of the pan. Instead I just pulled the sides of the foil out and then could cut really easily...plus I didn't have to clean a dish!


If you are curious what I really added to this recipe it would be the use of the foil (or you could use parchment paper) in he dish. I put the foil in so that there was a could couple of inches hanging over the sides. This way, when I went to pull the dish and cut it in to the bars I was didn't have to try to work around the sides of the pan. Instead I just pulled the sides of the foil out and then could cut really easily...plus I didn't have to clean a dish!

Peanut Butter Krispie Bars
makes one 8x8 pan

3 T. unsalted butter
4 c. miniature marshmallows (plus an extra cup to snack on whilst you bake)
1/3 c. creamy peanut butter
1/2 t. coarse salt
6 c. puffed rice cereal
nonstick cooking spray or vegetable oil
2 packages (24 oz.) milk chocolate chips (I think it might even be delicious to try dark)
1/4 c. chopped, roasted salted peanuts
aluminum foil or parchment paper

Put a layer of aluminum foil or parchment paper in the 8x8 pan with some of the foil/paper overlapping of the sides. This will make the bars easier to remove and keep the pieces together. Spray the foil/paper with nonstick spray or butter. In a large pot, combine marshmallows, peanut butter, butter, and salt. Cook over medium, stirring CONSTANTLY, until melted, about four minutes or so. Add cereal and stir. With a wooded spoon greased with cooking spray or oil, press half the cereal mixture into dish. Spread half of the melted chocolate on top. Repeat with remaining cereal mixture and chocolate. Sprinkle top with peanuts.

(Store in an airtight container for up to three days.)

Saturday, July 10, 2010

Caramel Heaven

I love homemade caramel. Then again, who doesn't? I learned to love homemade caramel candy after feasting on a batch made by my friend Cheryl. The delightful little candies were creamy and smooth. I could have eaten a hundred of them. (I probably have since first trying them.) Cheryl also showed me the joy of licorice caramels when she added anise extract to a batch of her fabulous creations. Since I love black licorice, there was no question about whether or not I'd love the caramels. When Mr. C and I were dating, I took licorice caramels to some of his family members as I met them. (The C family is a black licorice loving bunch!)

Imagine my joy back in May when some homemade caramels were given to me as a favor at a Mother's Day tea party I went to. It had been a while since I had nibbled on some homemade goodness, so I dove in and had a piece. HELP ME RHONDA, my caramel world stopped. These caramels were, far and away, THE BEST homemade caramels I'd ever had. They were so soft, chewy, and bursting with that unmistakable caramel flavor. PLUS, they had a layer of nuts on the bottom. In all my years of caramel munching, I'd never had homemade caramels with nuts. Having tried this new version of my old classic, I knew I'd never go back to where I'd been. There was one good/bad thing about my gifted treasures. They had been made with walnuts. This was bad for Mr. C who is deathly allergic to walnuts. But, this was good for me because it meant I got to eat them all myself! (I did tell Mr. C I was sorry he couldn't have any as I repeatedly stuffed them in my mouth!)


After arriving home from the tea party, I immediately emailed the hostess BEGGING for the recipe. She kindly obliged. (Thanks Kristi!) When I needed a treats to put with a church message this week, these caramels seemed the perfect option. Plus, the recipe gave me a chance to finally use the new digital thermometer my dad's wife had given me for Christmas. (I've been on a year long hunt for a reliable digital candy thermometer and Donna surprised me with one from Williams-Sonoma!)

Homemade Caramels with Nuts
1 c butter
1 16-oz pkg. brown sugar (2 1/4 c)
1 14-oz can sweetened condensed milk
1 c light corn syrup
1 t vanilla
1 c chopped nuts (I use pecans)
Line an 8x8 or 9x9 pan with foil extending edges over the pan. Spray foil with non-stick cooking spray. Sprinkle prepared pan with nuts. In a heavy 3 qt. saucepan, melt butter over low heat. Add brown sugar, condensed milk, and corn syrup. Mix well. Cook and stir over med-high heat to boiling. Cook and stir over med heat to 238 degrees. Remove saucepan from heat; stir in vanilla. Immediately pour caramel mixture in to the prepared pan. Let cool. When caramel is firm, use foil to lift it out of the pan and lift the caramel piece off the foil. (I cut mine directly on my countertop.)  Use a buttered knife to cut in to 1" squares. Wrap squares in wax paper squares. Makes 2 lbs.

This recipe was very similar to the version I had been using with a couple of exceptions (besides the nuts). My old recipe calls for 1 1/2 c of light corn syrup. This one only uses 1 c. And, my old recipe called for 2 c of white sugar while this one uses 2 1/4 c of brown. (I'm convinced the brown sugar is one of they keys to this version being as fabulous as it is.) If you don't like nuts, you can easily not use them. If you like nuts, USE THEM. It takes your candy to a whole new level!

Oh yeah, and the digital thermometer worked like a dream. I'll never go back to the dial kind.

Two quick side notes. First, make sure you have your caramel off the heat when you pour in your vanilla (or other extract you are using to flavor your candy). Even off the heat, the extract will react a bit with your hot caramel. On the heat, it's just plain dangerous. I always stand back just a bit when pouring my extract in so I'm free of splatters and the inevitable vapors that result. Second, the recipe says you can use 2 c of light cream in place of the condensed milk if you want, but it will double the time it takes to get to 238 degrees. You'll be stirring for 45+ minutes rather than 15-20.


Mr. C was so kind to wrap all my little beauties as I tried to cut them. (The recipe isn't kidding when it suggests a buttered knife. I had to spray my knife with Pam after cutting each row.) He ran in to a bit of trouble when some of the wax paper squares I'd cut were too small for square caramels so he started rolling and wrapping them in an oblong shape. I will confess a couple got gobbled up before being wrapped. I still had quite a few left after what I needed for my church stuff and also filling a container for Mr. C to hand out at work. After having 2 of them for breakfast the next morning, I started farming them out to friends. They're a great way to add a little to happiness to some one's day. Plus, I knew I was doomed to eat them all if they continued to live in my kitchen. Double bonus!


Go make a batch of these...right now...go make them. And just so you won't get too sick from eating them all, share them with your friends and neighbors. I will confess to still having a couple here in the house. Just thinking about them is making my mouth water. OK, that's it. I'm going to find one.

P.S. If you want licorice flavored caramels, or any other flavor for that matter, add a dram or two (depending on how strong you want your flavor) to the caramel mixture when you add the vanilla. But, stand back. The oil will react like the vanilla and cause some vapors for a few seconds. It's nothing major, but I thought you should know. Consider yourself warned!

P.P.S. on 10/6/11...So, I've done a little revamping of this post.  After making my caramels again, I'm back to my original 238 degree stopping point.  I have updated that in this post.  Also, the bigger your pan, the thinner your caramels will be, so choose your pan size accordingly.  (I typically use a 7 X 11 pan because I like my pieces about the size of a caramel square you'd get at a candy shop.)  I've also found an easier way to cut my pieces, rather than getting my knife all gummed up, is to roll a pizza cutter back and forth really quickly.  The thicker the caramels the gummier your cutter will get, but it can be better than a knife at times.